

Charging your clients a booking fee, or partial or full payment in advance for an appointment has never been easier! This is all you need to do:
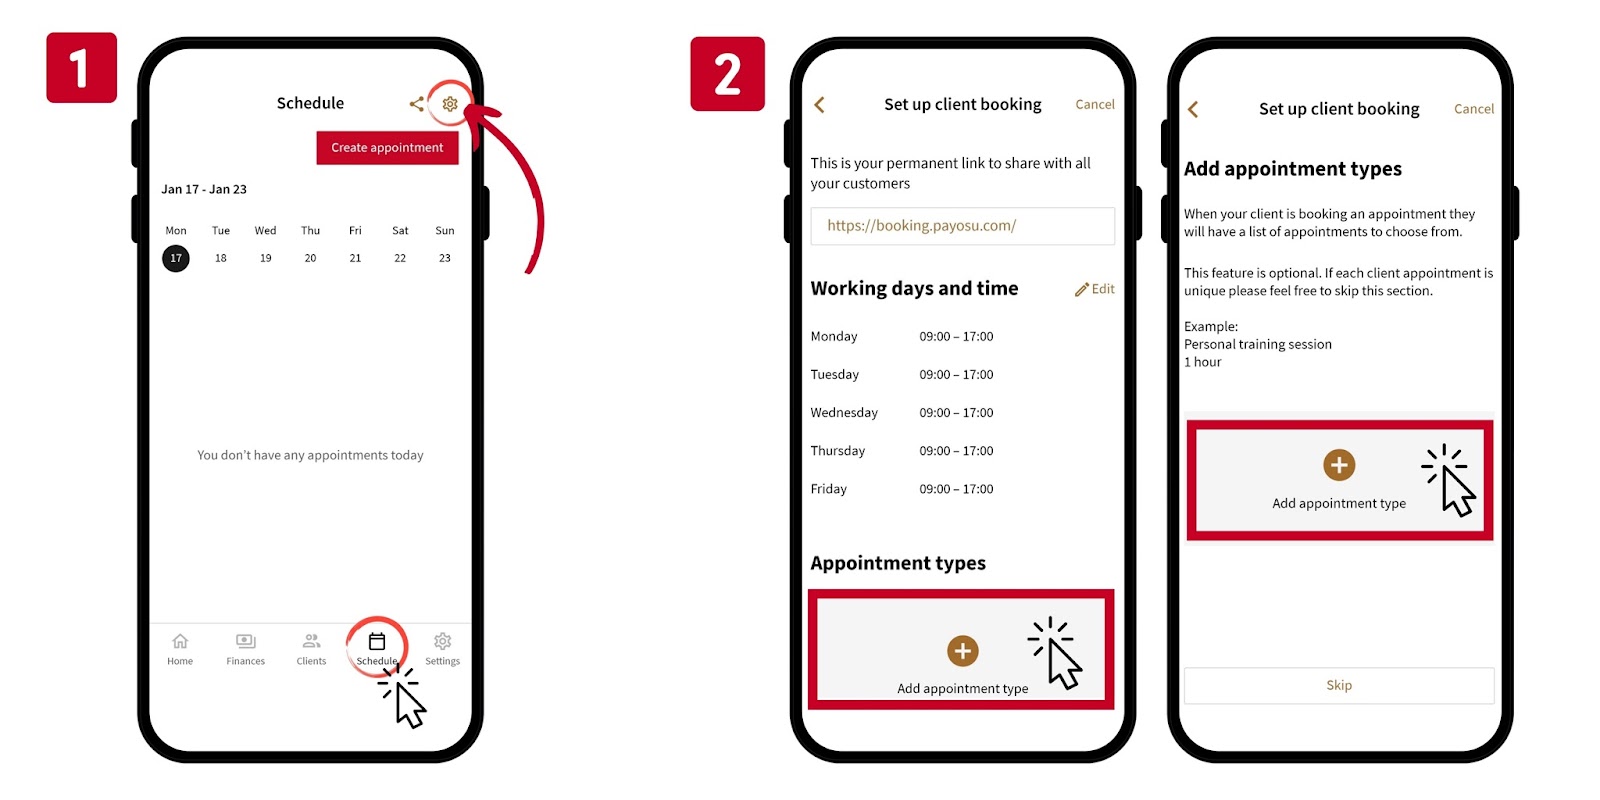
1. Go to ‘Schedule’ and then tap the ‘Settings’ button
2. At the bottom of the page, you can see the button to create your ‘Appointment Type’. After clicking here, you will need to click on ‘Add Appointment Type’.
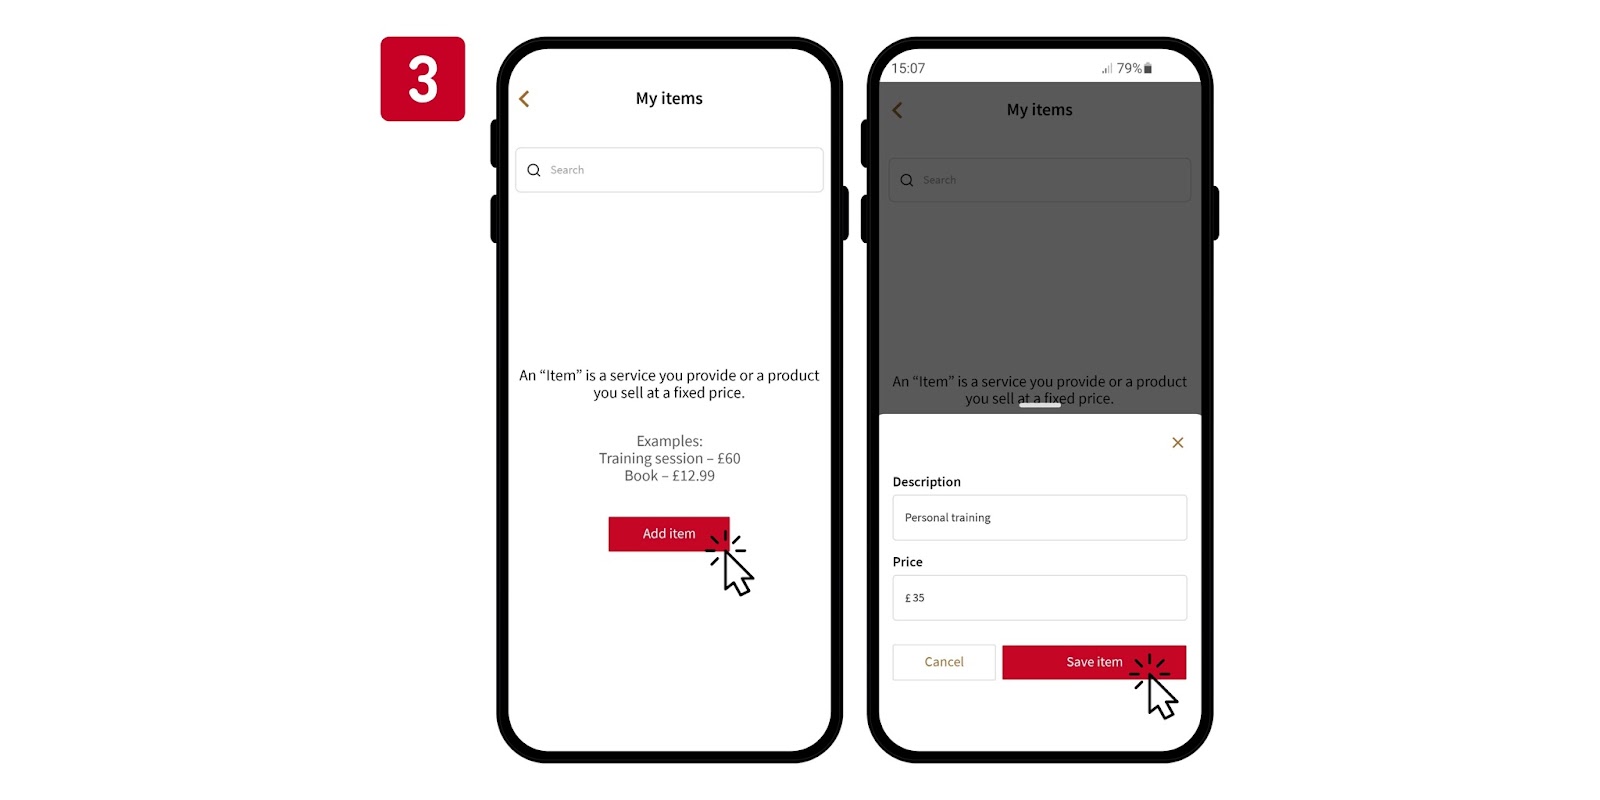
3. Then click ‘Add Item’ and fill out the details of the service/item you will be charging for in this ‘Appointment type’;
⭐️ Pro tip: To delete or edit an item, swipe left and you'll see the two option buttons.
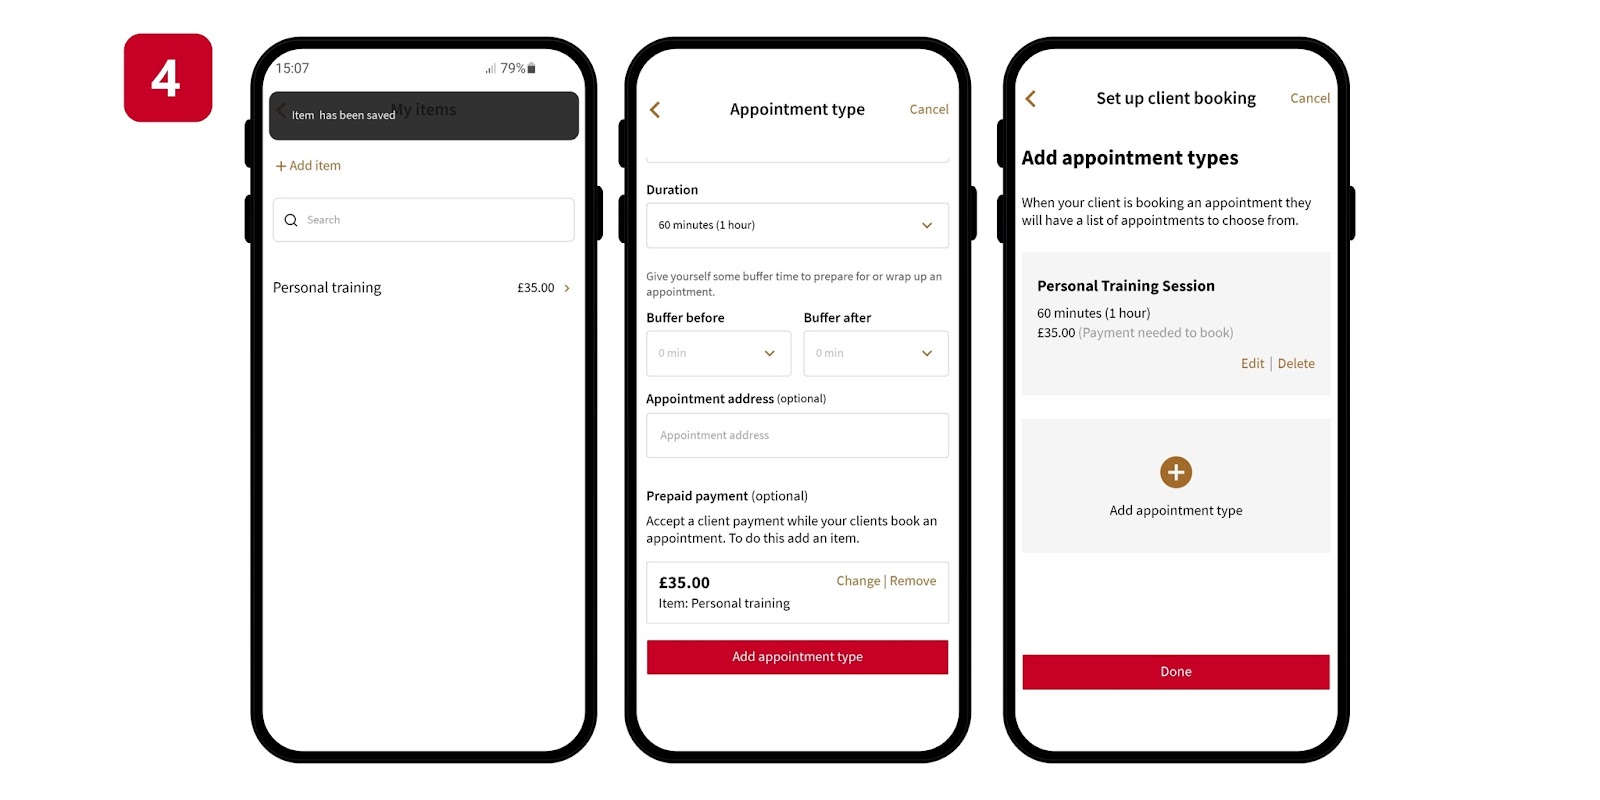
4. You will then see your added item that is ready to be used. Yay! 🥳 Click on that item and fill out all the other important details regarding your appointment such as the title, how long it’s going to be, it’s location and so on!
⭐️ Pro tip: As you are here, make sure to set your ‘Working days and times.’ This is super important so you don’t get people trying to book at odd times!
5. After the ‘Appointment Type’ is created, you will see a link at the top of your ‘Set up a client booking’ page. Copy it and send it to your clients. You can also add this to your website, share it within groups. Anyone who clicks it will have the option to book based on your availability!
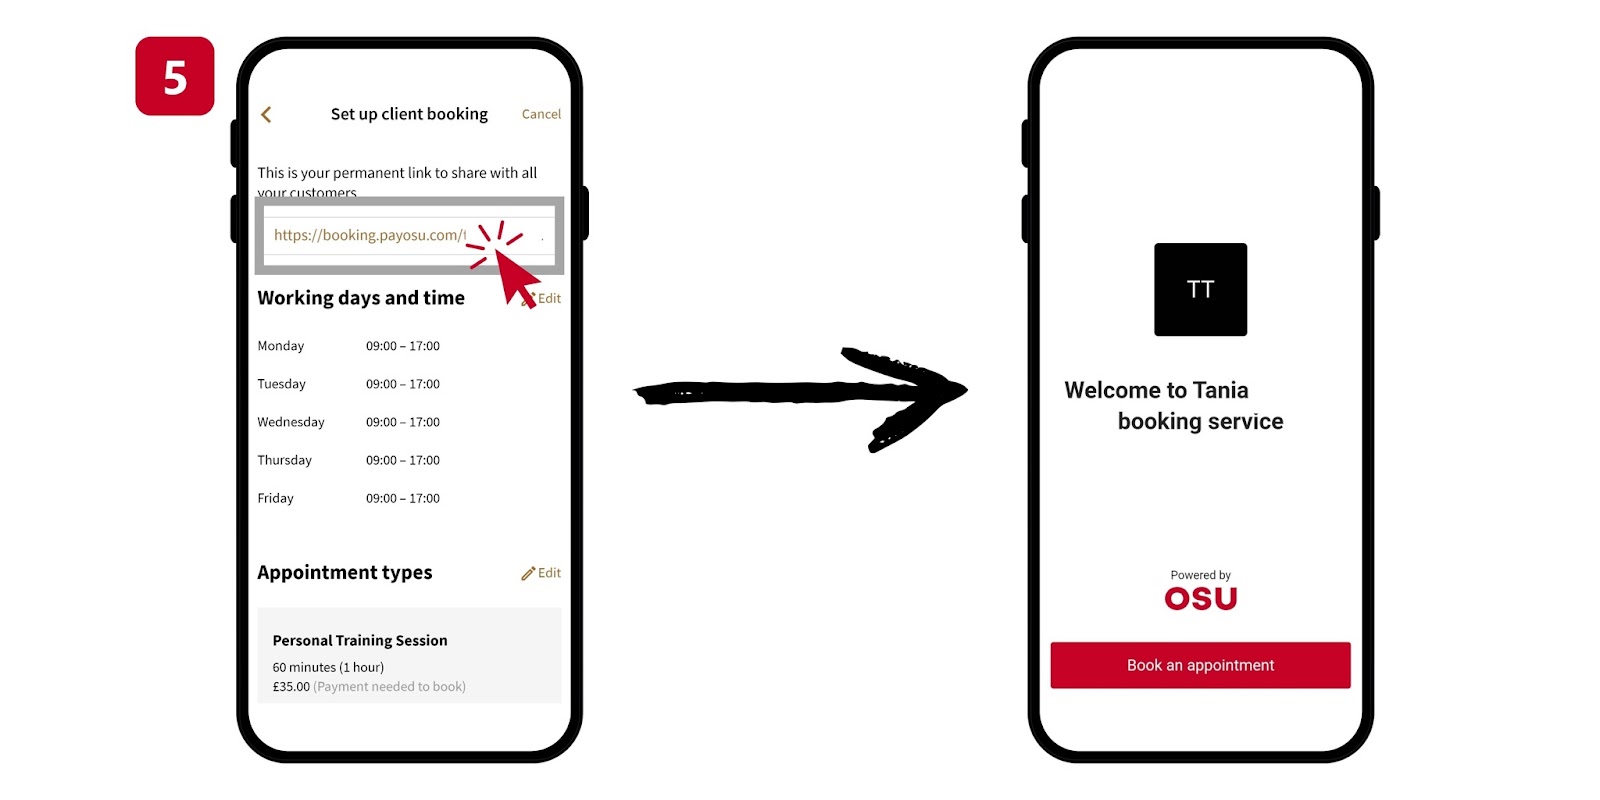
To give you more clarity on this process, here is a snapshot of what happens next when your client clicks on the link you have provided.
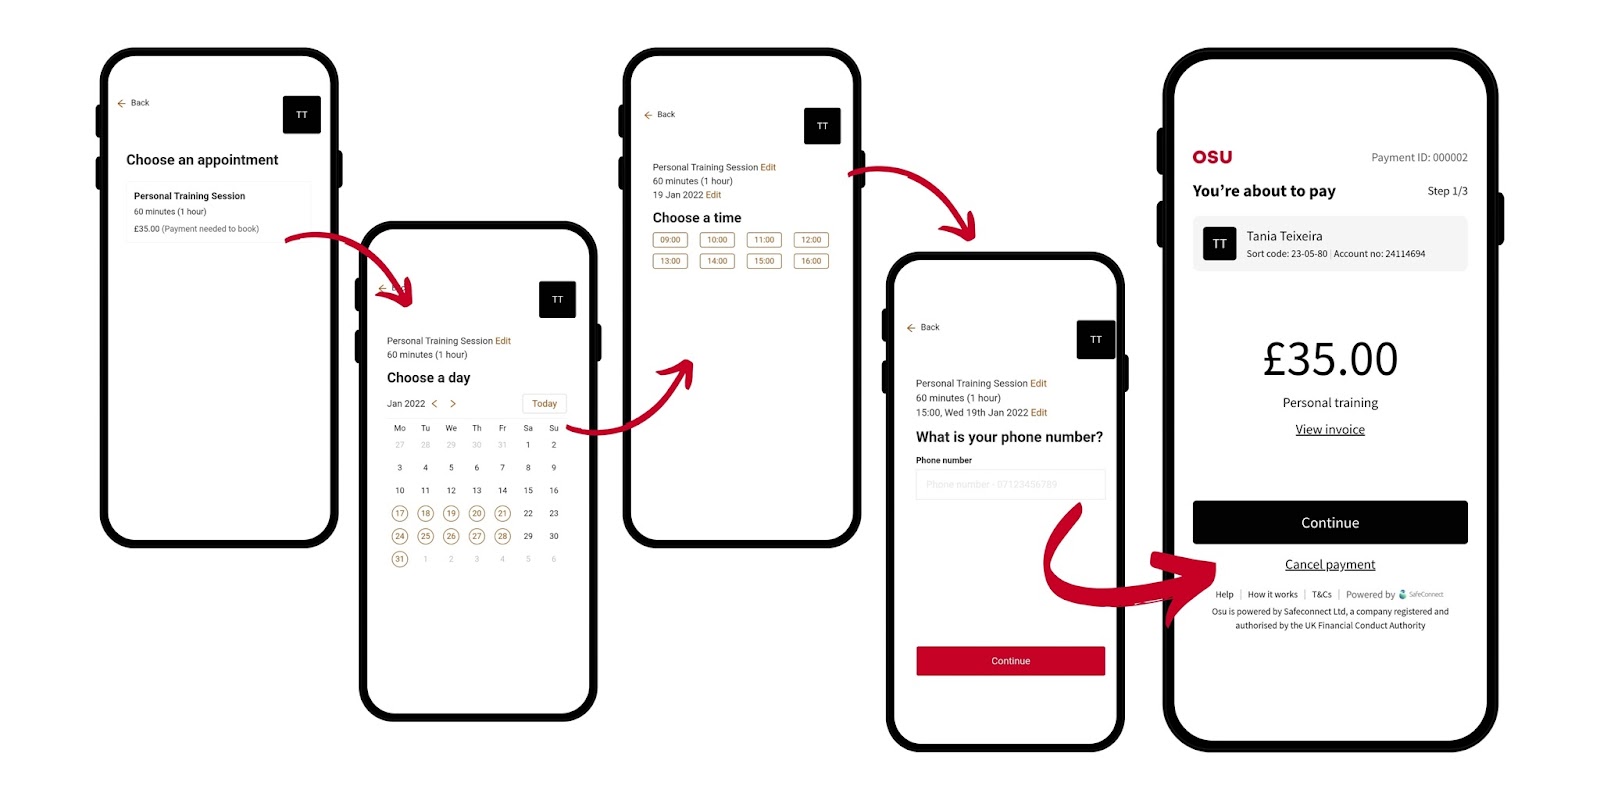
6. After the payment is completed, your client will see a success page letting them know that the booking is now awaiting your final confirmation.
7. You’ll receive a mobile notification and a message in the app showing you the booking details. In one tap you can confirm the booking, decline it, or propose an alternative!